If you’re planning to build a dynamic and feature-rich website, DotNetNuke (DNN) can be an excellent choice for your content management system (CMS). This popular platform offers flexibility and scalability, allowing you to create and manage web content with ease.
To get started with DNN, you can install it directly from your Plesk Onyx control panel, simplifying the setup process. In this comprehensive guide, we’ll walk you through the steps to install DotNetNuke from Plesk Onyx and have your website up and running in no time.
What is DotNetNuke (DNN)?
DotNetNuke, often referred to as DNN, is an open-source CMS that empowers users to create and manage websites, web applications, and intranet portals. It’s built on the .NET framework and is known for its user-friendly interface, extensibility, and robust features. With DNN, you can easily publish, edit, and organize web content without requiring extensive technical knowledge.
Why Choose DotNetNuke (DNN)?
Before we dive into the installation process, let’s explore why DotNetNuke is a compelling choice for many website developers and administrators:
- User-Friendly Interface: DNN offers an intuitive and user-friendly interface, making it accessible to both beginners and experienced users;
- Extensibility: With a vast library of modules and extensions, you can extend the functionality of your website to meet specific requirements;
- Scalability: DNN is highly scalable, allowing your website to grow as your business or project expands;
- Security: The DNN community prioritizes security, providing regular updates and patches to keep your website safe from vulnerabilities;
- Content Management: It offers robust content management features, making it easy to create, edit, and organize content effectively.
Now that you understand the benefits of DotNetNuke, let’s proceed with the installation process.
Installing DotNetNuke (DNN) via Plesk Onyx
Prerequisites
Before you begin, ensure you have the following prerequisites in place:
- Plesk Onyx Control Panel: You should have access to a Plesk Onyx control panel. If you don’t have one, consider setting it up with your hosting provider;
- Domain Name: You should have a registered domain name where you intend to install DotNetNuke;
- Database: Create an empty database using your Plesk control panel. Make note of the database name, username, and password as you’ll need them during the installation.
Step 1: Access Plesk Onyx Control Panel
Log in to your Plesk Onyx control panel using your credentials. Once logged in, you’ll have access to the Plesk dashboard.
Step 2: Navigate to Domains
In the Plesk dashboard, click on “Domains” to access your domain management settings.
Step 3: Choose Your Domain
Select the domain where you want to install DotNetNuke. Click on the domain name to access its settings.
Step 4: Access “Web Applications”
Within your domain settings, find and click on “Web Applications.”
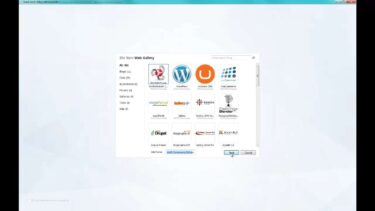
Step 5: Install DotNetNuke (DNN)
In the Web Applications section, you can find DotNetNuke listed as an available application. Click on it to start the installation process.
Step 6: Configure DotNetNuke (DNN)
During the installation, you’ll need to configure several settings:
- Location: Choose the location where you want to install DotNetNuke. You can install it in the domain’s root directory or in a subdirectory;
- Database: Enter the database name, username, and password you created in the prerequisites step;
- Admin Account: Set up an administrator account for your DNN site. This account will have full control over the website;
- Website Settings: Configure basic website settings such as the website name and description.
Step 7: Complete the Installation
Once you’ve configured all the settings, click on the “Install” or “Finish” button to begin the installation process. Plesk Onyx will automatically install DotNetNuke for you.
Step 8: Access Your DotNetNuke Website
After a successful installation, you’ll receive a confirmation message. You can now access your DotNetNuke website by entering your domain name in a web browser.
Extending DotNetNuke (DNN) Functionality
Now that you have successfully installed DotNetNuke (DNN) through your Plesk Onyx control panel, it’s time to explore how you can extend the functionality of your website.
DNN offers a wide range of modules and extensions that can enhance your site’s capabilities and provide an even better user experience. Here are some key ways to extend DNN.
Modules and Skins:
– Modules: DNN modules are pre-built components that add specific features to your website. These can include forums, galleries, e-commerce solutions, and more. You can find a variety of free and premium modules in the DNN store.
– Skins: Skins control the overall look and feel of your DNN website. They define the layout, color scheme, and design elements. Many DNN skins are available for purchase or free download, allowing you to customize your site’s appearance.
Third-Party Extensions:
DNN has a thriving ecosystem of third-party developers who create extensions to expand its functionality. These can include custom modules, skins, and various integrations with other software and services.
Mobile Optimization
Ensure that your DNN website is responsive and mobile-friendly. Many DNN skins and themes are designed to adapt to different screen sizes, but you should test your site on various devices to ensure a seamless experience for all visitors.
Search Engine Optimization (SEO)
DNN offers built-in SEO features, but you can further optimize your website for search engines. Use SEO-friendly URLs, add meta tags, optimize your content for relevant keywords, and create an XML sitemap.
Content Management:
Take advantage of DNN’s robust content management features. Organize your content effectively using categories and tags. Schedule content publishing and expiration dates, and collaborate with other users on content creation.
Security Measures
DNN is known for its security features, but it’s essential to keep your site secure. Regularly update DNN and its extensions, implement strong passwords, and configure security settings to protect your site from potential threats.
Maintaining Your DotNetNuke (DNN) Website
After installing DotNetNuke and customizing it to your needs, ongoing maintenance is crucial to keep your website running smoothly. Here are some essential maintenance tasks:
- Regular Backups. Schedule regular backups of your DNN website, including the database and files. This precaution can be a lifesaver in case of data loss or unexpected issues;
- Software Updates. Keep your DNN installation, modules, and extensions up to date. Developers frequently release updates to improve functionality and security;
- Performance Optimization. Monitor your website’s performance, and optimize it as needed. Compress images, enable caching, and consider using a content delivery network (CDN) to speed up your site;
- User Management. Regularly review user accounts and access permissions. Remove inactive users and ensure that only authorized individuals have access to sensitive areas of your site;
- Security Audits. Conduct regular security audits to identify and address vulnerabilities. Implement security best practices and consider using a web application firewall (WAF) for added protection;
- Content Updates. Keep your website’s content fresh and relevant. Outdated content can negatively impact your site’s credibility and search engine ranking.
Conclusion
Installing DotNetNuke (DNN) from your Plesk Onyx control panel is a smart choice for those seeking a user-friendly and feature-rich content management system. With its extensive customization options and robust community, DNN empowers you to create a website that meets your specific needs.
Regularly update your content, stay informed about the latest DNN developments, and explore new ways to enhance your site’s functionality. By doing so, you’ll ensure that your DNN-powered website continues to thrive and provide value to your visitors.
DotNetNuke through Plesk Onyx is an excellent combination for those looking to create powerful and dynamic web experiences without the complexities of manual installation. Start your DNN journey today, and unlock the potential of this versatile content management system.


