Let’s first break down the concept of a DSN. What exactly is a Data Source Name (DSN)? At its core, a DSN is a set of instructions detailing how to link to a particular data source, often a database.
It serves as the intermediary that enables smooth communication between your software and the database. Within this name, essential details like the database’s whereabouts, its kind, and login details are present.
Why Do You Need a DSN?
DSNs offer several advantages in data management and network connectivity:
- Centralized Configuration: Having a DSN allows you to centralize connection settings to the database. This means any changes to the database’s location or access credentials can be made in one place, simplifying maintenance and updates;
- Security: They enhance connection security to databases by securely storing sensitive information like usernames and passwords, reducing the risk of security threats;
- Ease of Use: After configuration, your applications can connect to the database without needing to know the intricacies of the connection. This simplifies the development process and minimizes errors;
- Portability: DSNs ease the process of moving an application to a different environment. You can change the configuration to point to a new database server without altering the application code.
Now that you understand the importance of DSNs, let’s move on to the steps to create them.
How do I Create a DSN?
Creating a Data Source Name using Open Database Connectivity (ODBC) involves several steps to configure the connection to a data source, typically a database. Below are the steps for creating a DSN using ODBC on the Windows operating system:
Note: The steps may vary slightly depending on the Windows version, but the overall process remains similar.
Step 1: Access the ODBC Data Source Administrator:
- Press the Windows key on your keyboard or click the Windows “Start” button;
- In the search bar, type “ODBC” or “ODBC Data Source Administrator” and press Enter;
- This will open the ODBC Data Source Administrator window.
Step 2: Choose the Type of DSN:
- There are two primary types of DSNs you can create;
- User DSNs: These are specific to an individual user and are typically stored in their profile. They are best suited for individual users who need access to a data source;
- System DSNs: These are system-wide and can be used by all users on the computer. They are usually used when multiple users or applications require access to the same data source;
- Select the appropriate tab depending on whether you want to create a User DSN or a System DSN.
Step 3: Add a New DSN:
- After selecting the User DSN or System DSN tab, click the “Add” button;
- A list of available drivers will appear. Choose the driver that corresponds to your data source. For example, if you are connecting to a Microsoft SQL Server database, select the “SQL Server” driver. Click “Finish.”
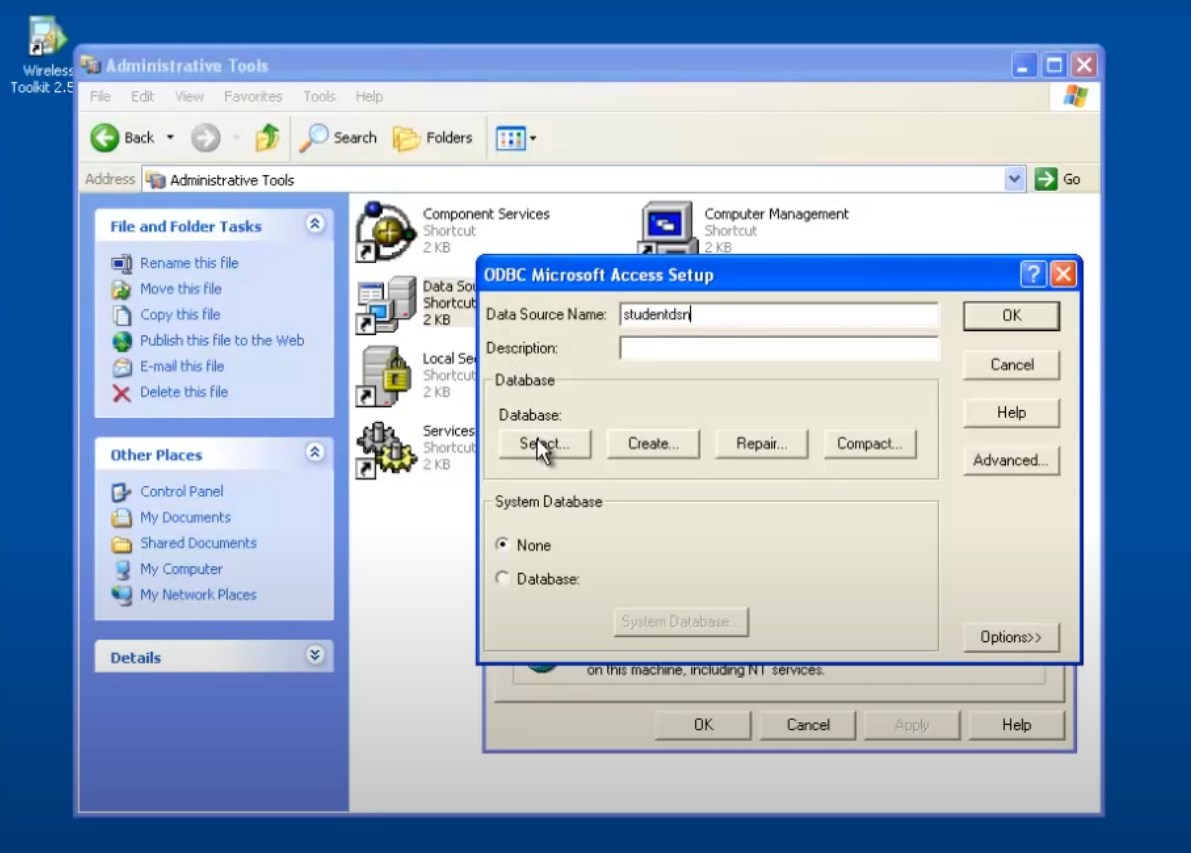
Step 4: Setting Up the DSN
At this stage, you’ll need to input specific information to set up the DSN. The exact details required will hinge on the data source’s nature and the chosen driver.
However, a few universal parameters include:
- Data Source Name (DSN): Assign a descriptive name to the DSN that aptly represents the data source it links to;
- Brief Note (optional): Add a concise remark for more clarity regarding the DSN;
- Host Name: Input the server’s designation or IP address where you can find the data source.
- DB Title: When relevant, input the particular database’s name you wish to link;
- Login Method: Depending on your preference, opt for Windows Login (secure connection) or SQL Server Login (enter a user ID and secret code);
- Extra Connection Details: Some driver versions might demand additional configuration, like declaring a specific port or turning on data protection. Always check the data source’s manual for guidance.
Step 5: Test the Connection
After configuring the DSN, it’s essential to test the connection to ensure everything is set up correctly. In most DSN setup wizards, there is a “Test Connection” or “Test” button. Click it to confirm that the DSN can successfully establish a connection to the data source.
Step 6: Save the DSN Configuration
After testing and confirming the functionality of the DSN, save the configuration. Your DSN is now ready to be used.
Step 7: Use the DSN in Your Application
To use the created DSN, you need to configure your application to utilize it. The specific steps for this depend on the programming language and libraries or frameworks you are using. In general, you’ll need to specify the DSN name and credentials in your application’s connection settings.
That’s it! You have successfully created a DSN using ODBC, which can now be used to connect your applications to the specified data source.
Conclusion
Creating a Data Source Name (DSN) is a fundamental step in improving data management and connectivity. It allows you to centralize configuration, enhance security, simplify application development, and improve portability.
By following the steps outlined in this guide, you can create a DSN that meets the needs of your data source and application. A properly configured DSN will enable you to make better use of your data’s potential for informed decision-making and business success.