Internet Information Services (IIS) represents Microsoft’s formidable web server platform, frequently deployed within the Windows Server ecosystem. While it is often linked with the hosting of .NET applications, it remarkably accommodates the operation of WordPress, an application rooted in PHP. In the forthcoming discourse, we will embark upon a comprehensive journey, elucidating the intricate steps of installing and configuring WordPress on the IIS framework.
Prerequisites and Considerations
Setting the Stage for a Smooth Installation
Before diving into the PHP installation on your Windows server or Windows 10 machine, it’s crucial to set the stage for a seamless experience. By taking care of these prerequisites and considerations, you’ll ensure that your PHP setup is both secure and efficient.
1. Operating System Compatibility
Verify that your server is running a supported version of Windows. PHP can be installed on Windows Server or Windows 10, but you must ensure compatibility with your chosen PHP version.
2. Administrative Rights
Administrative privileges are a must. You’ll need them to make changes to Internet Information Services (IIS) and install the required PHP components. Without these rights, your installation process may come to a halt.
3. Regular Updates
Keep your Windows operating system up to date. Regular updates not only enhance system security but also contribute to overall stability. Ensure that your server’s defenses are fortified by staying current with security patches and feature updates.
4. Backup and Restore Plan
While not a prerequisite, it’s a wise move to have a backup and restore plan in place. In the rare event of unexpected issues during the installation, having a backup ensures you can quickly revert to a stable system configuration.
5. Evaluation of PHP Version
Depending on your project requirements, consider the PHP version that best suits your needs. Newer versions offer enhanced features and security, while older ones may be necessary for legacy applications.
6. Documentation and Resources
Familiarize yourself with the official PHP documentation and online resources. Having these references at your disposal will prove invaluable as you navigate through the installation process.
7. Security Measures
Review your server’s security measures to safeguard against potential threats. Ensure that firewalls and antivirus software are in place and properly configured.
By addressing these pre-requisites and considerations, you’ll be better prepared to embark on a successful installation journey.
Installing PHP on IIS
IIS, the robust web server by Microsoft, doesn’t inherently support PHP. However, with a bit of manual installation and configuration, you can seamlessly integrate it into your environment. Let’s explore the step-by-step process to achieve this.
1. Download from the Official Website
Navigate to the official website (php.net) and download the appropriate non-thread-safe version of it for Windows. Choose the version that aligns with your project requirements and server architecture.
2. File Extraction
After downloading, extract files to a designated directory on your server. The common choice is C:\PHP, but you can choose a different location based on your preference.
3. Configuration
Within the extracted files, locate the ‘php.ini-development’ file and rename it to ‘php.ini.’ This file serves as the configuration hub for PHP. Open it using a text editor and make adjustments as necessary. Key configurations to consider include:
- Memory limits: Set appropriate memory limits based on your application’s needs.
- Error reporting: Configure error reporting settings to facilitate debugging.
4. FastCGI Installation
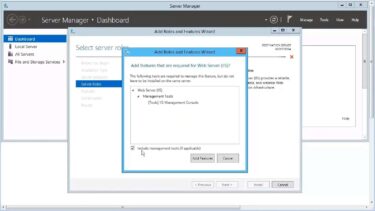
PHP efficiency on IIS is greatly improved when you utilize FastCGI. Install the FastCGI feature from within IIS. Here’s how:
- Open the Server Manager;
- Navigate to ‘Manage’ > ‘Add Roles and Features.’;
- Select ‘Role-based or feature-based installation.’;
- Choose your server from the server pool;
- In the ‘Roles’ section, select ‘Web Server (IIS)’ and ensure that the ‘CGI’ option is checked;
- Complete the installation process.
5. Link PHP with FastCGI
After installing FastCGI, you need to link with it within the IIS manager:
- Open the IIS manager;
- Select your server in the Connections pane;
- Under the ‘IIS’ section, locate ‘FastCGI Settings.’;
- Add a new application and specify the path to the PHP CGI executable (e.g., C:\PHP\php-cgi.exe).
Installing MySQL or MariaDB for WordPress
WordPress, the powerful content management system that fuels millions of websites, relies on a robust database system. Among the array of database options, MySQL and MariaDB stand out as the go-to choices for most users. Here’s your comprehensive guide to installing and configuring these databases for WordPress, ensuring a solid foundation for your website.
1. Download and Install
MySQL:
Visit the official MySQL website (mysql.com) and navigate to the download section.
Choose the appropriate version for your operating system (Windows, macOS, or Linux).
Follow the installation wizard, making sure to customize your installation options as needed.
MariaDB:
- Head over to the MariaDB website (mariadb.org) and access their downloads page;
- Select the version compatible with your operating system and follow the installation instructions;
- Consider using a package manager for Linux distributions for a streamlined installation.
2. Configuration
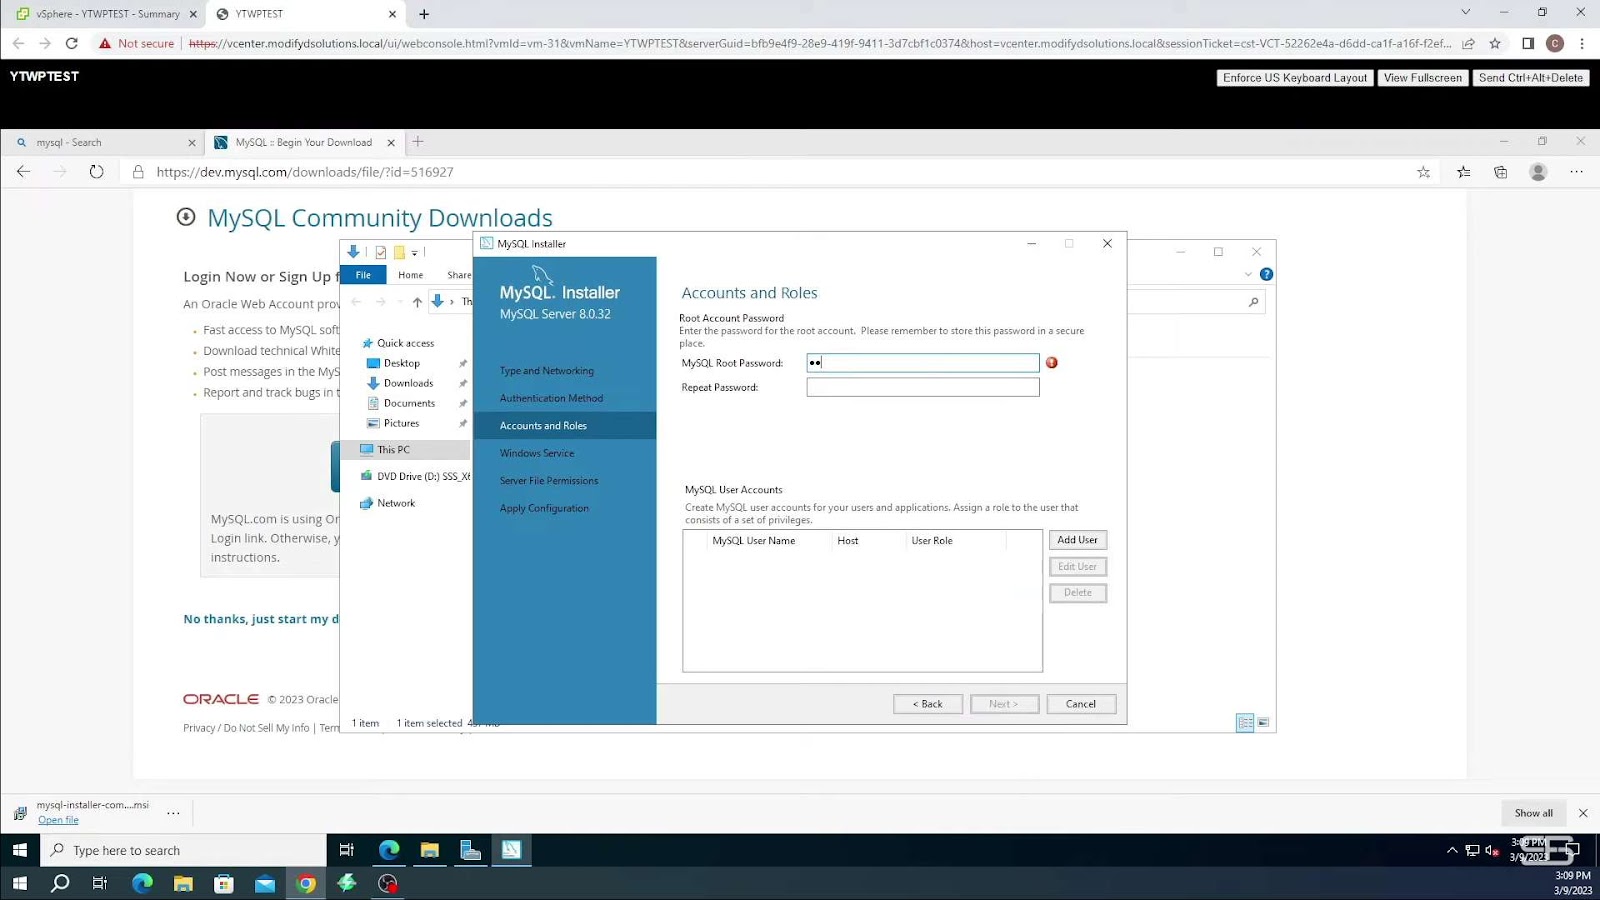
Once you’ve successfully installed MySQL or MariaDB, it’s crucial to configure them securely:
Creating a Resilient Root Password:
As you embark on the installation journey, an important step awaits – the establishment of a robust root password. It is imperative that this password possesses both strength and uniqueness, as this is a pivotal element in fortifying the security of your system.
Crafting a Database:
Upon successfully completing the installation process, it is time to delve into the realm of database management. You have two choices at your disposal: you can either navigate to the user-friendly database management interface, such as phpMyAdmin, or opt for the more command-line-driven tools. Regardless of your preference, your objective remains the same – to create a brand-new database, tailor-made for your WordPress installation.
A crucial piece of information to retain is the name of this newly minted database, for it will be an indispensable component in the forthcoming configuration of your WordPress setup.
Configuring IIS for WordPress
Now that you’ve laid the groundwork by installing MySQL or MariaDB, it’s time to fine-tune your web server. In this section, we’ll guide you through configuring Internet Information Services (IIS) for an optimal WordPress experience.
1. Adding a Website
- Open the IIS Manager on your server;
- In the left panel, expand ‘Sites,’ right-click, and select ‘Add Website.’;
- Provide a name for your website, and set the physical path to the directory where WordPress will reside.
2. Installing URL Rewrite
- To ensure WordPress’s permalinks work correctly and improve SEO-friendliness, you’ll need to install the URL Rewrite module;
- You can download this module from the official IIS website (iis.net) and follow the installation instructions;
- Activate the module in your IIS Manager once it’s installed.
3. PHP Configuration
- To make WordPress function smoothly, ensure that IIS knows how to handle PHP files. This involves configuring handler mappings;
- In your IIS Manager, navigate to ‘Handler Mappings’ and add a new handler mapping for PHP files (e.g., *.php);
- Specify the path to the PHP executable (e.g., php-cgi.exe or php.exe) and configure permissions as needed.
Pro Tips:
- Keep your IIS server updated with the latest security patches and updates;
- Regularly back up your website and database to prevent data loss.
Setting Up WordPress
Embarking on the journey of crafting a robust and dynamic website begins with the foundational step of WordPress installation. This comprehensive guide is designed to ensure a seamless and efficient WordPress setup:
- Commence by navigating to the official WordPress website at www.wordpress.org to procure the most up-to-date version;
- Afterward, select the ‘Download’ button, saving the compressed WordPress file directly onto your computer;
- The subsequent pivotal step is to unpack the WordPress archive;
- Opt for the designated path that you previously specified in IIS Manager when creating your website. This meticulous selection guarantees the flawless integration of WordPress into your web environment.
Configuration Setup
Now, initiate your web browser and steer it towards your website. Upon doing so, you will be presented with the WordPress installation script, awaiting your input.
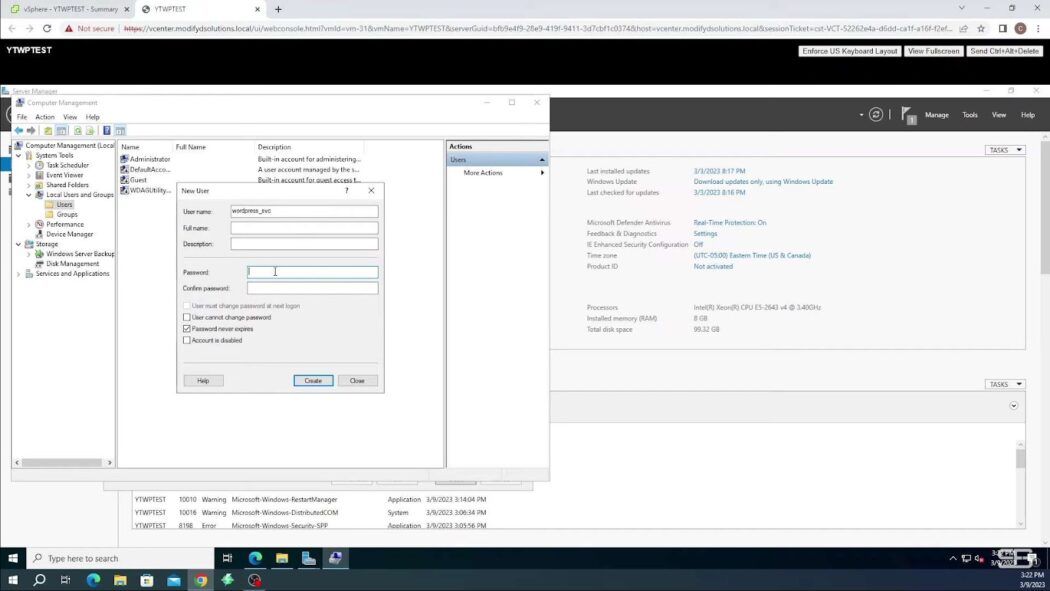
In this phase, you will be required to furnish vital information:
- Database Name: This entails assigning a moniker to the database where WordPress shall house its data;
- Username: Forge a distinctive username, destined to serve as the administrator account for your WordPress installation;
- Password: Craft a robust and secure password to fortify your website’s defenses;
- Host: Typically, this field remains ‘localhost’ if your database resides on the same server.
Follow the prompts on your screen diligently, and rest assured that WordPress will autonomously oversee the remaining installation process.
Installation Complete
- Congratulations! You have proficiently completed the WordPress installation procedure!;
- To gain access to the backend of your website, simply log in to the WordPress admin dashboard using the credentials you established during the installation process.
Turbocharging WordPress Performance on IIS
Once your WordPress site is up and running, optimizing it for speed and efficiency is crucial. Here’s how to supercharge its performance:
Caching for Speed
Consider using caching plugins specifically designed for IIS. These plugins store static versions of your web pages, reducing the need to regenerate content for each visitor.
Some popular caching plugins for IIS include WP Super Cache and W3 Total Cache.
Database Optimization
Your website’s database can become a performance bottleneck if not properly managed. Use these techniques to keep it in peak condition:
- Regular Cleanup: Delete unnecessary data, such as spam comments and post revisions;
- Indexing: Ensure that your database tables are properly indexed to speed up data retrieval;
- Database Optimization Plugins: Utilize plugins like WP-Optimize or WP-DBManager to automate database maintenance tasks.
Stay Updated
Regularly updating your WordPress core, themes, and plugins is essential for security and performance. Here’s why:
- Security: Updates often include patches for vulnerabilities, making your site less susceptible to hacks;
- Performance: Developers also optimize code in updates, leading to faster load times.
Comprehensive Guide to Troubleshooting Common Issues
1. Permalink Disruptions:
Permalinks are essential for the structural clarity and SEO-friendliness of a website. If they’re malfunctioning or not redirecting appropriately, there could be underlying issues.
- Suggested Solution: Ensure the installation of the URL Rewrite module. This module is critical for URL structure and redirection. If already installed, delve deeper into its settings to ensure it’s properly set up. Sometimes, minor tweaks or a reinstall can rectify the issue;
- Further Insights: Permalinks not only make URLs look cleaner, but they also play a crucial role in how search engines index a site. Therefore, ensuring their proper function is critical for website visibility and user experience.
2. PHP Error Encounters:
PHP errors can disrupt a site’s performance or even make it inaccessible. Recognizing and addressing these errors promptly is key to the smooth operation of a web platform.
- Suggested Solution: Start by examining the php.ini file. This is the default configuration file for running applications that require PHP. Within it, ensure that the error reporting setting is accurately configured. This will help in highlighting any errors that might be occurring. Additionally, consistently check and analyze the error logs. These logs provide detailed insights into what might be causing the PHP disruptions;
- Further Insights: PHP errors can arise from various issues, including outdated plugins, theme conflicts, or server-side complications. Regularly updating and maintaining the website’s backend components can mitigate potential PHP-related problems.
3. Database Connection Dilemmas:
For a website, particularly those using platforms like WordPress, the database is its backbone. When there’s a connectivity issue, the site could crash, display errors, or act unpredictably.
- Suggested Solution: One of the primary files to inspect in this scenario is the wp-config.php file, especially for WordPress users. This file contains vital information regarding database credentials, such as the name, username, password, and host. Any discrepancies in these details could lead to connection failures. Ensure all details are accurate and correspond to the database settings;
- Further Insights: Database issues can also stem from server downtimes, exceeded hosting limits, or even cyber-attacks. Regularly backing up the database and employing security measures can safeguard the website from significant losses and breaches.
Conclusion
Operating WordPress on an IIS server might appear atypical, yet, by adhering to precise procedures and settings adjustments, it becomes an entirely viable undertaking. This comprehensive manual presents a methodical pathway to guarantee a seamless setup and flawless functionality. It is imperative to maintain backups, coupled with diligent server and WordPress upkeep, to fortify stability and bolster long-term security.